Creating custom notifications
| NOTE | Custom notifications are available for certain hoist types only. |
Navigating to your asset-level notification
settings
- Sign into the StatusControl portal at https://statuscontrol.demagcranes.com.
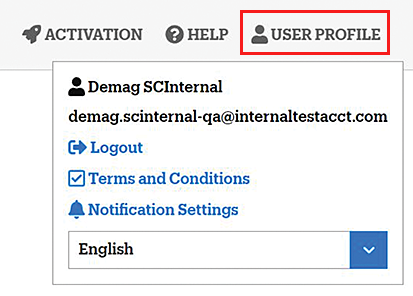
- Access your user profile and select Notification Settings.
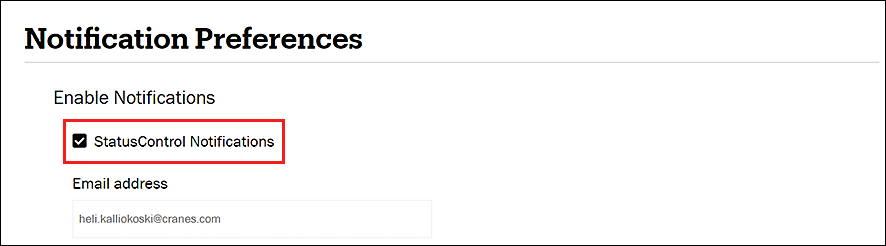
- Make sure that your StatusControl
notifications are on.
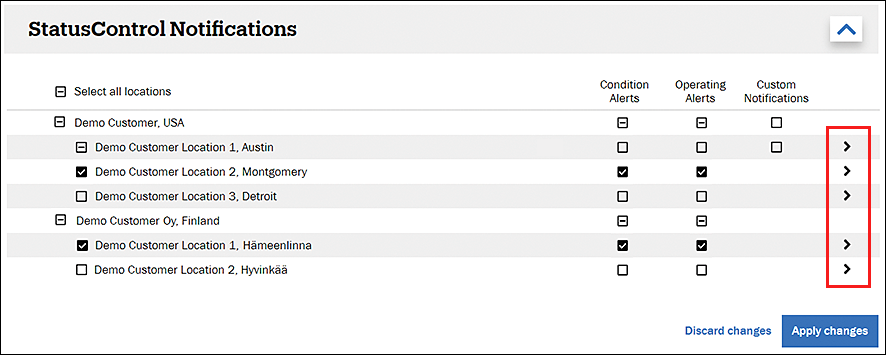
- Select the customer and location of the assets
(cranes) from which you want to get custom notifications.You can select many customers and locations at a time, or proceed one by one.

- Select the arrowhead button of the location where
the asset (crane) is.
Setting up a custom notification
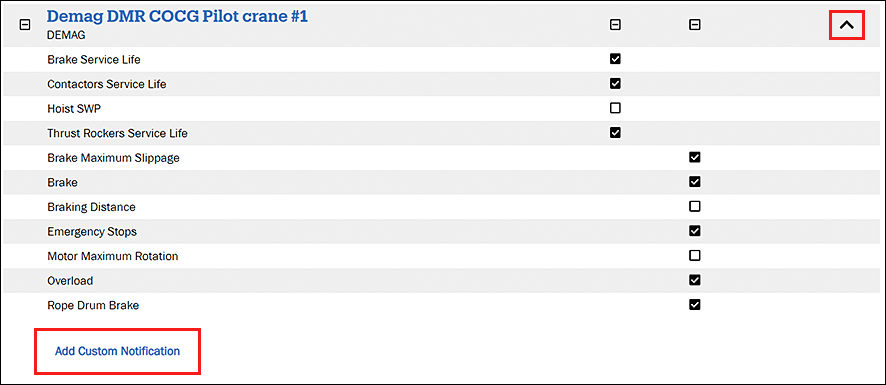
- Open the notification details of the asset with the arrowhead button.
- Select Add Custom Notification.
- Fill in the fields.
Field Instruction Type Select the notification type (for the correct hoist, if multiple). - Cycles: In practice, one hoisting cycle corresponds to one lift with a load.
- Running time: Refers to the running hours of the hoisting motor.
- Starts: Refers to the starts of the hoisting motor, with the movement being up or down.
Set Interval Give the interval after which the notification is sent to you. - For running time, enter the number of hours.
- For starts and cycles, enter the number of starts or cycles.
Notification Message Enter the message that you want to get. The maximum number of characters is 100. A tooltip appears if the message is too long. In this example, we want to get a notification that reminds us to inspect the hoisting brake after 2,000 starts. The starts are counted from this moment on.
- Apply your changes.
The notification appears under the asset. The notification applies only to this asset, and it is turned on by default. The Remaining counter reflects the current number of running hours, starts, or cycles after which you get the message. - To edit the notification, use the following
functions.
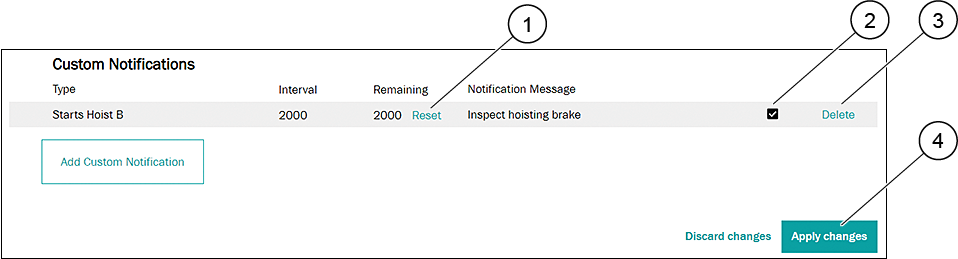
- Reset the Remaining counter to your original Interval value
- Turn off the notification
- Delete the notification
- Apply your changes
- Go back to the customer/location level table by scrolling up and selecting Back top left.
- To exit your user profile, select the Back button again.